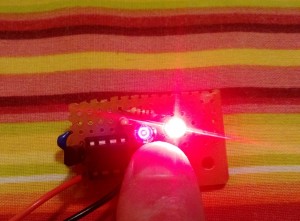
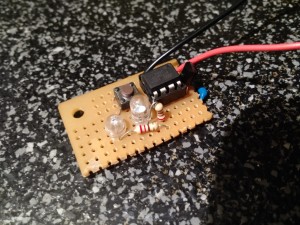
 Several years ago I was into astrophotography and I ended up building a barn door tracker, or Scotch mount, for use with my camera. For this to work well I also needed a way to trigger my camera without touching it. My Pentax K-x uses an infrared signal as the shutter trigger for which an IR remote is normally used. For long exposures, my camera allows for an IR signal to open the shutter and another IR signal to close the shutter. My particular remote did not function very well and required me to manually press the buttons. This made consistent timing difficult and was boring. I wanted to automate this process so exposure times would be consistent and so that I could stargaze while my camera clicked away, or sit inside my warm house during a night of winter exposures.
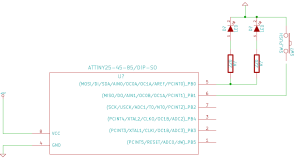 I designed a small circuit to do this based on an Attiny25 microcontroller. The circuit is very simple consisting of a single AVR, two resistors, two LEDs (one red and one IR), and one tactile switch. Both LEDs are driven by a single pin on the AVR configured for output. The tactile switch is connected to a pin configured as input. The power input is 5v. Not shown in the schematic (but is present in the photograph) is a 5v L78L linear voltage regulator and a couple of ceramic caps. This allows me to power from sources up to 30v though I usually use a 12v UPS battery. Current draw is only 12mA so I don’t care to use a switching mode buck converter.
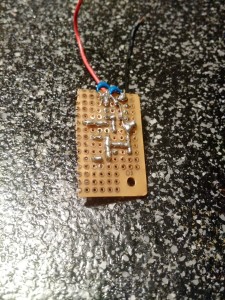 The AVR is configured to run at 8Mhz and I also calibrated the internal oscillator with an oscilloscope to dial in on 8Mhz. A timer interrupt is configured to count each millisecond which the program uses as a clock. The C program is available here. The IR carrier frequency for the Pentax camera is 38kHz. The IR sequence for the shutter is 13ms of carrier frequency, 3ms pause, followed by seven 1ms pulses with 1ms pause between each. I have to admit, I found this sequence in someone else’s program, but it has been so long that the source escapes me.
To operate the IR trigger, the tactile switch is held down to set the exposure time. While the switch is held down the LEDs will flash once a second, each flash indicating one minute of exposure. To kick off the exposure sequence, the tactile switch is pressed for less than one second. After the exposure time has elapsed, the LEDs will flicker to signal the camera to close the shutter. The exposure sequence will then repeat six seconds later. This six second pause allows the camera to process the previous image before beginning the next. If this delay is too short the camera may miss the shutter signal and become out of sync.
This has worked quite well for my needs allowing me to take many multi-minute exposures with almost no interaction from myself.

The Milky Way, just below Vega (the bright star at the top). 10 stacked exposures, 4 minutes each. Total exposure time, 40 minutes.
Parts List
- AVR Attiny25 x 1
- 8 pin dip socket x 1
- 220 ohm resistor x 2
- Red LED x 1
- IR LED x 1
- Tactile switch x 1
- Protoboard
- Optional:
- L78L x 1
- Ceramic caps (see L78L datasheet)
